
If you are taking your boat out of the water after a long time, you will be able to use a pressure wash to remove bottom growth. Don't wait for it to dry or it will harden and become difficult to remove.
If you have a well maintained boat, your bottom preparation may require little more than a good scraping. The only thing to really be concerned about is to guarantee compatibility of your new coating over the old. If in doubt, remove it.
I am assuming you have a "bad" bottom and want to start over. For heavy removal start with an electric orbital sander at 1400 RPM using a 36 grit disk. On my boat, the primary sanding was stopped with about half the primer layer left on and finished with an air powered random orbit sander running on 80 psi with a 40 grit disk.
Take precautions to protect your lungs as bottom paints can contain poisons! Eye and ear protection is a must when using power tools.
There are no boat yards or hoisting equipment at the Great Salt Lake, so I used a 2-ton hydraulic engine hoist to lift the hull in front and back off the trailer to sand these hard to reach spots.
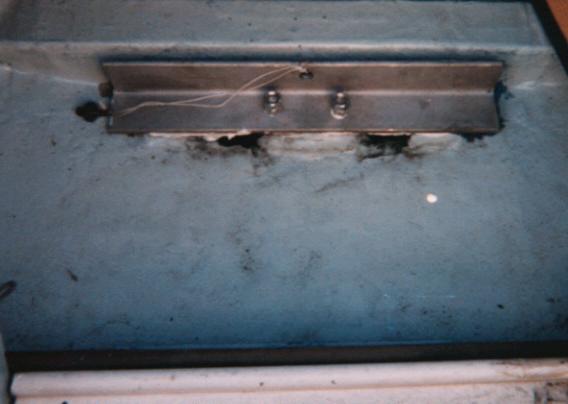
One excellent tip about bottom work was obtained from Wesley Bachman of the Convair Sailing Club. You can actually suspend a Victory from the sternmost keel bolts using an "L" shaped piece of metal. Off course, this assumes you have some sort of frame to support the boat from above.
I use a hoist to launch my Victory. I have a lifting plate (a piece of 2.5 inch X 2.5 inch stainless steel "angle-iron") attached to the keel via the aft-most keelbolts. Unfortunately the center of balance of the boat is about a foot aft of the end of the keel root. This may, in part, be due to the fact that my boat has a bulb-keel. But the result is that hoisting the boat in-line with the lifting plate would be something of a disaster (i.e., the boat would tip way back, forcing the mast into the hoist). The fix is to use a bridle attached to the lifting plate and the eye in the stern fitting (where the backstay attaches to the deck/hull). The attachment point for the hoist on the bridle is, in principle, dictated by the balance of the boat. In practice, on my boat anyway, the balance point is just aft of the companionway (but I can move it a bit by shifting gear around). The bridle that I use is made of stainless steel cable with thimbled eyes at either end and a large steel ring in the middle for the hoist hook to attach. You can, however, make a bridle out of heavy-duty nylon webbing. You also have to attach a couple of stabilizing lines between the hoist-bridle junction and the sides of the boat (I use the genoa fairleads for the attachment points) to keep the boat from tipping to one side or the other (and it _will_ tip without them). This all may seem complicated but it is actually much easier, and safer, than hoisting with slings, and it is a lot easier on the trailer than using a ramp.

I noticed my Victory had gelcoat cracks on both side right below the toe rail on the bow and stern. These appear to be caused by improper slinging. If your sling is not set to hold the sling open on top with a spreader, the weight of the boat will cause the sling to bend to toe rail inward and fracture the gelcoat if not the fiberglass of the hull.
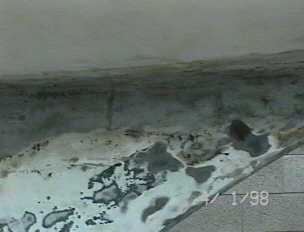
Fairing the keel is a matter of special interest. All low and exposed areas should be ground out using a dremel and coated with Duraglass body filler. All bare metal and bare fiberglass must be primed before filling. A great deal of time must be spent fairing the keel to a smooth and uniform surface.
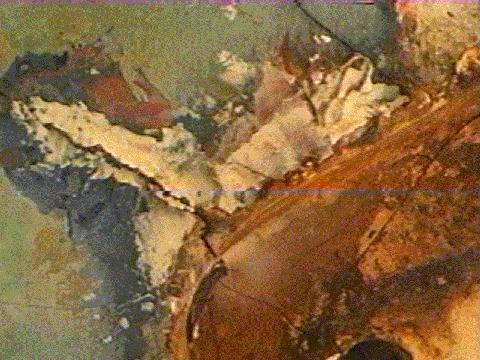
Leading Edge of Keel Showing Exposed Cast Iron |

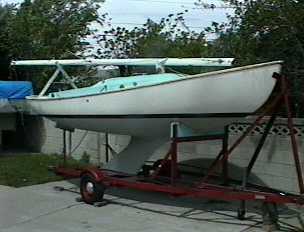
Keel after Fairing and Painting |
Replacement of keel bolts does not necessitate keel
removal. The cast iron keel widens out into a flange about four inches wide
at the top with three countersunk holes along each side. The bolts are just
big countersunk flat-head screws that are secured by nuts on the inside of
the hull. The nuts on the aftermost pair of bolts can be accessed by
removing the bilge cover. The other four bolts are accessed by removing
the cuddy sole. Inspection of where the bolts come up through the hull will
give you an idea of where to dig for the heads on the bottom side of the
hull. If you scrape enough material off the bottom right next to the keel on
both sides in the right places, you will uncover the screw heads. It is
safest
to replace one bolt at a time, that way the rest of the bolts support the
weight
of the keel. Just remove the nut and drive the bolt out the bottom of the
boat.
The presence of corrosion may make that much more difficult than I have
made it seem. The center of mass of the keel is cantilevered out so far
aft of the flange that the two forward pairs of bolts could probably be
replaced
without supporting the keel by auxiliary means. However, before replacing
either of aftermost pair of bolts, the weight of the keel should be
supported,
as by blocking and wedging.
How deep you'll have to dig to reach the keel bolts depends on how much
filling and fairing has been done over the keel flange. I would bet that it
would be less than an inch, and in most cases, much less. The screw heads
are just right there under the surface. You will probably find them covered
by at least one layer of glass fabric. That Crazy Board in the Bottom
of the Boat Its a hull stiffener. If it and/or the keel
bolts get bad, you'll start getting a crack in the hull at the base
of the keel. It will almost certainly have some rot problem as
is is in a position to be constantly damp. I've heard of two
methods of repair. One method is to piece meal grind and fill
every accessible inch of the board with one of the two part wood
repair products. I have no reports on the longevity or
strength of this method of repair. The better, though more
intensive method of repair, is to cut the hull members, replace the
board with a new prepared piece thoroughly encased in epoxy and
glass fabric, and then reglass the hull members in place. This
method appears to be better.
Richard L. Strasia, Victory 21 #315, has undertaken a much more involved process. In order to fix a problem with hull stress cracks around the keel, he has actually dropped the keel. There is plywood stiffener in the bottom of the hull which the keel bolts to. This plywood can become rotted and allow the hull to flex around the keel. This boat had a fairly serious problem with hull flex and cracking so by dropping the keel and replacing the plywood, Richard will restore hull strength.
Prepare surface for repainting by washing it three times with hot, soapy water and then giving the entire surface a thorough cleaning with with a solvent based desiliconizer such as "Prep-Sol" to remove wax, oils and silicone residues. Starting at the bow and working to the stern, use one way strokes and turn the rag often. This prevents simply moving the residues from one place to another rather than removing them. Even after sanding these residues can remain on the hull surface. You may actually still have traces of the mold release from your boat's original manufacture.
In fact, if you are preparing above water line surfaces to be painted, you should use the desiliconizer prior to sanding; otherwise, you may actually end up with residue in the sanding scratches which is then even more difficult to remove. You can't get the surface too clean!
Gelgoat below the water line at this point is ready to apply the new paint. Any bare metals or fiberglass must be primed with VC No-Sand. This is an extremely unfriendly material in terms of being breathed so make sure you have plenty of ventilation!
The materials you choose to coat your boat's bottom with depend partially upon whether or not you will be trailering it. Many anti-fouling paints have a very short life span out of the water. For this reason, I recommend using a "hard" paint such as Micron CSC Extra. A barrier coat can be applied to prevent blistering. I used Interlux 3000/3001 which is a two part epoxy paint. Both types of bottom paint were applied with a 10 inch roller. I used a high quality resin core dacron roller.
Some people apply the paint from bow to stern to make any lines parallel to the flow of water over the hull. I left my hull with a rough finish, but many people will sand their hulls to a smooth finish. Richard Strasia recommends sanding and polishing to 1500 grit. Personally, I don't know if it makes any difference, but I do know that a dimply golf ball travels farther than a smooth one because lower wind resistance, so maybe a dimply finished boat will have lower water resistance for the same reason.
I've heard similar speculations along these "lines" before, and I have often wondered myself if this would work. So when I saw your theory I sat down and worked it out. The numbers are probably not exactly right, because I had to make several assumptions (size, shape, and location of the roughness for instance), but the gist of the analysis should hold true.
Here goes nothin':
Although in principle this would work for what fluid engineers refer to as a "bluff body", such as a cylinder or a golf ball, it shouldn't apply to a "streamlined section", such as a sailboat hull. Even if you consider the hull a bluff body (and I've seen some production hulls that come pretty close), the drag coefficient is only lowered within a certain range of velocities. For a golf ball in air (a small object in a fluid that isn't very viscous) the drag coefficient is lowered between about 20 m/s (meters/second) and 80 m/s (about 40 to 160 mph). For a Victory in normal salt water (a much larger object in a much more viscous fluid; of course, the water in GSL is even more viscous) the drag is only lowered between about 0.01 and 0.04 m/s (about 0.02 kts and 0.08 kts). More importantly, above 0.04 m/s dimpling will _increase_ the drag coefficient. At about 2 kts the drag coefficient will be about doubled. Of course, this is assuming that the hull is acting as a bluff body, which it really isn't. For a streamlined section roughness will _always_ increase the drag coefficient of the hull at all but the very slowest speeds (for a Victory, speeds below about 0.3 kts). Therefore, when dealing with boat hulls, its always prferable to have as smooth a surface as possible.
Note that the roughness of roller or brush marks in paint isn't exactly what engineers refer to when making these sorts of analyses, it is actually much "smoother". Therefore, the increase in drag coefficient at higher speeds is probably not as great as my calculations would indicate.
One thought that came to mind is that dimpling the mast might lower its drag coefficient during high winds (i.e., it would act something like a golf ball). Dimpling would lower the drag coefficient of a 15 cm thick mast in air between about 8 kts and about 30 kts. But above 30 kts dimpling would increase the drag (right when one wants as little drag as possible), so I guess that that wouldn't work either. :(
On the other hand, if we wanted to sail really fast boats, we wouldn't be sailing a 40 year-old design. :)
Bottom line question then is this: How much wind velocity is it going to take to get a Victory to maximum theoretical hull speed? I've never heard of one planing, and mine never has...
Much trickier question, at least if you want to figure out the answer from _theory_! The main problem is that it is very difficult to predict what the coefficient of drag is going to be without doing some empirical work (hence, all of the tank testing that is done by marine architects). It also depends upon such things as the point of sail, the sea conditions, etc. I doubt that it would be possible to get a Victory to really plane (the hull just isn't the right shape; i.e., no large flat areas).
However, I am able to get my boat well past hull speed without too much trouble. Here I am "surfing" rather than "planing", the distinction being that I can go fast enough so that the stern wake in just beyond the stern of the boat, but the boat isn't really "skipping" across the water. Theoretical hull speed for a Victory is about 5.2 - 5.3 kts (the over-hanging stern could add almost a half a knot to that), but on several occasions I have had my boat up to 6.8 - 7 kts, according to my GPS. Even if one assumes that the GPS readings were a bit off (due to currents, selective availability, plain old error, etc.), it's been obvious from the shape and position of the wake that I was well past hull speed.
Without too much chop on the water you should be able to get past hull speed in a 20 kts wind. Saturday the Pteropod was surfing rather nicely, at about 6.5 to 6.8 kts, on a close reach in about 15 to 25 kts of wind. When we turned downwind for the run back to the marina, she still did 5.5 to 6 kts in bursts, but it was a bit harder to keep her surfing as the wind was starting to die. If you do get your boat to surf, you can really feel the difference when she settles back into acting like a true displacement hull. It feels like someone put the brakes on for a few seconds, and then the "hole in the water" made by your wake seems much deeper.
Greg Anderson, Convair Sailing Club Race Chief and curator of Victory 21 #647, writes:
The order of finishing in handicap racing is determined by corrected time. The winner is the boat having the earliest corrected time. Handicap ratings are given in seconds per mile and are multiplied by the race distance to determine a correction that is to be applied to the actual finish time for each boat. The process for determining race results goes like this; first, the race committee records the actual time that each boat finishes, then the corrected time for each boat is calculated by using the following equation: corrected time C equals the actual finish time A minus that boat's rating R multiplied by the handicap distance for the race D. In algebra,
Note that if a boat has a negative number for a rating, that boat's corrected time will be later than it's actual finish time because subtracting a negative number is the same as adding a positive number. Once the race committee has calculated the corrected times for all the entrants, the corrected times are ordered from earliest to latest, and the boat having the earliest time wins.
The process of formulating a handicap rating for a given boat is a bit more nebulous. It is done by a handicapping committee who first decides on the average wind blowing over the area where the racing is to be conducted. Then the committee decides, hopefully by comparing the polars for the boat in question to the polars for some of the other boats it will be racing against, how much longer, if any, that boat will take to cover a nautical mile than boats whose ratings have already been decided on. No matter how good of a job the committee does at this, the result is going to be just an educated guess at best. The committee may adjust the rating later if, over a period of time the boat doesn't appear to be correcting out like it should relative to the other boats it was racing against. These adjustments and proposals for them are the subject of discussion, sometimes heated, at future committee meetings.
All lists of PHRF for the Victory 21 I have seen show the rating as 276.
The boot strap requires care to set and finish so it looks good. You can attempt to scribe the line in smooth water with the boat afloat. Another way is to mark the upper edge of the old stripe at the bow and stern before it is sanded away. Later you can level boat and remark the stripe. If you have a transit or a nifty laser level it's super easy, but the rest of us can do it with a water level. On the trailer its pretty straight forward. First level side to side at the scuppers by placing an eight foot spirit level across the gunnels and raising the lower side with a floor jack under the trailer axle. Then the level front to rear to the original marks using a water level. This is basically a hose with clear ends.
Mark the hull at close intervals from the original marks with the water level until the boot strap top is reposistioned. The less vertical the hull section, the closer you should mark your lines. To do the bottom, start at the most vertical part of the side of the hull and measure down the width you want the boot strap to appear, two and one half inches for example, then tranfer the marks around the hull. Obviously the stripe will be wider at the bow and stern, but it will appear uniform when viewed from the side. I don't know of any way to do this using a water level without two people. Your assistant simply tells you to raise or lower your end until it brings the water to the original mark he is watching, then you mark your spot.
Use plastic fine line tape to mark the edges and regular masking tape to mask beyond that. The fine line tape will leave a crisp, professional edge between the boot strap and the hull. The stripe should be painted with at least three coats of oil-based urethane paint. Black is a traditional color. I use a Purdy sash brush which has a beveled edge.
Before doing anything, give the hull or deck a good cleaning and wiping with prepsol. Scratches and gouges can be filled with gelcoat repair paste. The narrow cracks can be widened into a 'v' with a can opener. This will harden better if sealed off with SaranWrap and masking tape or even better if covered with a coat of polyvinylalcohol (PVA) which you may be able to get from a paint supplier. Sand smooth using 220, 400 and 600 grit wet dry, and buff using an orbital sander at 1400 rpm.
3M buffing compound and marine wax does good job with oxidization, especially if you have a colored topsides.
| Product | Amount | Cost | ||||||||||||||||||
|---|---|---|---|---|---|---|---|---|---|---|---|---|---|---|---|---|---|---|---|---|
| Micron CSC | 1 gal. | $139.99 | ||||||||||||||||||
| Interlux 3000/3001 | 1 gal. | $178.99 | ||||||||||||||||||
| VC/NoSand | 1 qrt. | $18.99 | ||||||||||||||||||
| Duraglass filler | 1/2gal. | $19.99 | ||||||||||||||||||
| Dacron Rollers | 2 | $12.98 | ||||||||||||||||||
| TOTAL COST | $370.94 |
You can get most, if not all, of these materials from West Marine