|
|
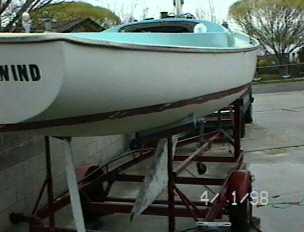
ArrivalThis Victory 21, which was then named 'Soft Wind', was purchased in Long Beach, California. The owner lived in Torrence. The boat was being sailed on an irregular basis, but it was kept in a slip by the owner. When purchased, the boat was for sale because the owner was moving. My father-in-law who lives aboard his 35 foot Owens sedan cruiser 'Six High' was shown the boat by a marina neighbor who sells boats. He knew the Victory's owner and had been sailing on the boat. |
The deal was struck, and the Victory was hoisted out of the Pacific and onto its trailer. The trailer needed some work before the long journey overland to the deserts of Utah and the Great Salt Lake. The trailer is an 'American' brand manufactured in Downey, California in 1962. The lights were rewired, and the wheel bearing packed as the bearing caps were gone, and the bearings looked badly in need of grease.
After an uneventful trip to Magna, Utah which is a mere ten minutes from the South Shore Marina of the Great Salt Lake, the Victory went into dry dock.
The first item to be attended to was the bilge, which due to heavy rains in California combined with the lack of a self-bailing cockpit on older Victories, was full of water! About 35 or 40 gallons. and the sails, rigging and gear were all stuffed in a sailbag together which was soaked and starting to mildew. This was quickly remedied. At one time, there was a bilge pump with an outlet on the starboard beam just below the toe rail, but the pump and battery were no longer aboard. Since the temperature was falling well below freeezing, the bilge was drained of water and filled with RV antifreeze and a tarp secured over the cockpit.
|
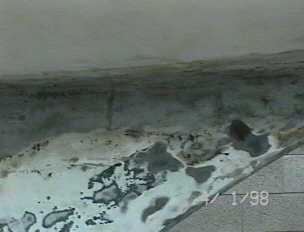
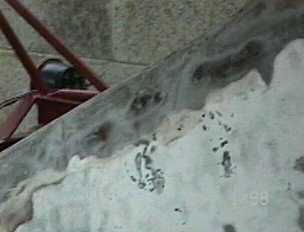
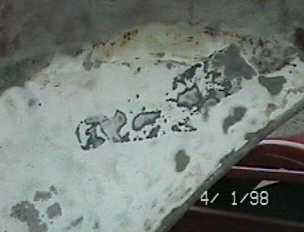
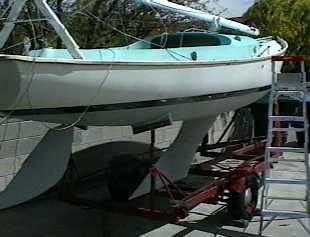
The intitial survey of the boat showed some repairs were in order. The bottom paint was very thin. There were about two dozen blisters scattered about the hull. Fortunately, none of them penetrated the gelcoat. Maybe they were just rock chips. Also the preparation of the rudder was improper, and the paint was peeling in large flakes. The topside was badly oxidized on both hull and deck. There were many scratches and scrapes along the hull. The boot strap was badly faded. There were several spots in the hull which has sustained impact damage resulting in gelcoat cracks, and improper bracing of the sling during a lift had bent the toe rail inward and created gelcoat cracks. A couple of old repairs to the hull above the water line had been painted rather than gelcoated which didn't match the rest of the hull. |
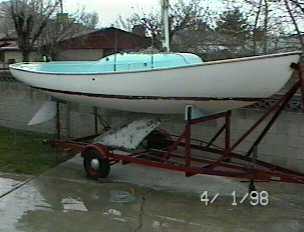
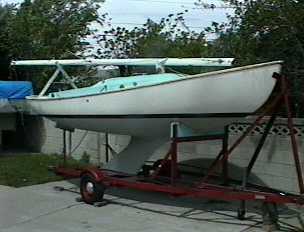
Starboard View Before Restoration |
|
Topsides, the wooden sole and cabin bulkhead had not been maintained
and were badly weathered and showing signs of dry rot. All the deck hardware
needed maintenance. The winches and cam cleats were all stiff. The shrouds
and wire halyards were in pretty good shape, but the rope halyards and
a line used to raise the mast were in very poor condition. Also the gallows
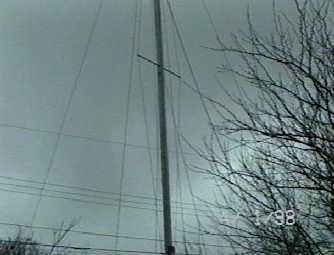
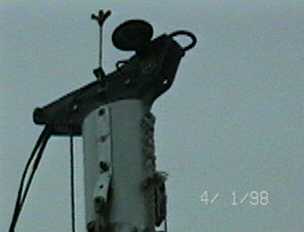
lift was missing. The mast had apparently been replaced at some
point. The masthead is not standard to a Victory. I believe at some time,
the original mast was probably damaged in a failure of the center chain plate eye.
This mast was about the right size and shape and was used to replace it.
The mast is rigged in a diamond spreader formation with the upper
shroud going to the rear most chain plate and the lower shroud going to
the forward chain plate. The center chain plate has nothing attached to
it, and is missing on one side which I think supports my theory.
The master was brought to One Design specifications by replacing a few parts with new parts from Catalina according to the mast diagram available on this site. |
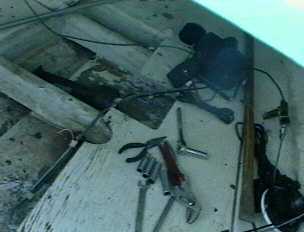
After consulting Dave Shearer of Sidsports, a local sailing technician, the bottom work began. The bottom was stripped of two layers of bottom paint. The outer layer, a light turquoise, and the inner layer which was probably original, a dark blue over brown primer. This was done using an electric orbital sander at 1400 RPM using a 36 grit disk. The primary sanding was stopped with about half the primer layer left on and finished with an air powered random orbit sander running on 80 psi with a 40 grit disk. I used a 2-ton hydraulic engine hoist to lift the hull in front and back off the trailer to sand these hard to reach spots. It was at this time I realized the blistering was really minor.
|
The keel was a matter of special interest. The bottom of the keel has sustained some grounding damage, and there were several spots where the cast iron had become exposed. Also there were areas of indifferent finish which lead to a very rough surface. All low and exposed areas were ground out using a dremel and coated with Duraglass body filler. A great deal of time was spent fairing the keel to a smooth and uniform surface. |
|
|
|

The bottom was prepared for repainting by washing it three times and giving the entire surface a thorough cleaning with "prepsol", a solvent to remove wax, oils and silicone. All areas of the hull which were not gelgoat were primed using VC No-Sand. (Hold your breath!) The bottom was given a barrier coat of Interlux 3000/3001 to ensure that there will be no future problems with blistering. The ablative bottom paint is Micron CSC in Shark White. Both types of bottom paint were applied with a 10 inch roller. I used a resin core dacron roller which is of very high quality.
Boot StrapThe boot strap required care to set. The original boot strap was marked fore and aft by tape at the upper edge. The boat was leveled side to side at the scuppers by placing a 8 foot spirit level across the gunnel and raising the lower side with a floor jack under the trailer axle. Then the boat was leveled front to rear to the original marks using a water level which is a hose with clear ends. Finally the the hull was marked at close intervals from the original marks with the water level until the boot strap was repositioned with an equal horizontal width all around of two and one half inches. Blue plastic fine line tape was placed to mark the edges and regular masking tape covered that. The stripe was repainted with three coats of oil-based urethane paint in black using a Purdy sash brush. |
Great Care is Taken to Make
|
The topsides of the hull was given a good cleaning and wiped with prepsol. All the scratches and gouges were filled with gelcoat repair paste. The narrow cracks were widened into a 'v' with a can opener. All the paint was sanded off and those areas recoverd with gelcoat. Everything was sanded smooth, and the whole thing buffed up using an orbital sander at 1400 rpm. 3M buffing compound and marine wax was applied with a buffing hood. The deck, cockpit and cabin top were buffed out in the same manner.
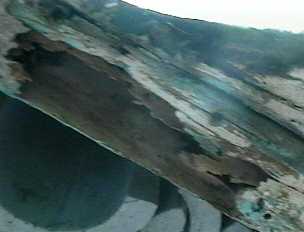
The stern took some extra effort to fix up. A trolling motor mount had been added at some point which was made of painted steel. This has rusted badly and stained the transom. Additionally, since I removed this mount, I had to fix nearly a dozen holes through the transom. This was done with Duraglass filler and gelcoat. A new mount for the electric trolling motor was made of mahogany and attached to the toe rail. This is much nicer looking than the old mount. During this work, I discovered the boat had been named 'Terry B' prior to 'Soft Wind'.
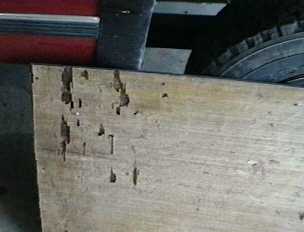
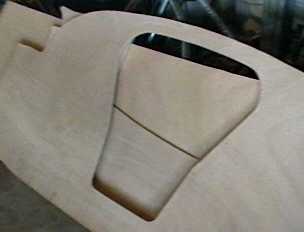
| Originally, I was going to strip the veneer from the plywood sole and bulkhead and paint them. The veneer was badly damaged from lack of varnish and sun and dry rot. Unfortunately, there was not enough good wood left in the bulkhead to paint, and termites had been at work in both the bulkhead and sole. So they were removed. The forward edges of the cockpit benches have boards embedded in the final layer of fiberglass laminate. These had also been damaged by termites. All these were removed. Almost all new constructionwas done in the marine plywood. I glued up layers of plywood and cut them to shape for structural elements and the hatch frame. There were mahogany pieces form the old hatch frame which I recycled along with the raised strips from the old sole. The original bulkhead was built in two pieces with the joint being verticle at the centerline. You can build the bulkhead in one piece and install it (just barely) if you remove all cabin top hardware and the compression post. The bulkhead is not quite perpendicular so you must place the bottom first and tip the top upward. You have to remove the cagin top harware or else the bolts will be in the way as you tip the bulkhead into place. |
|
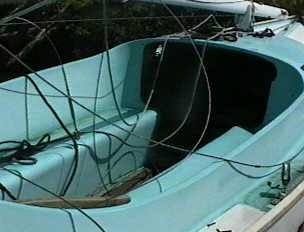
Looking into the Cabin without the Bulkhead |
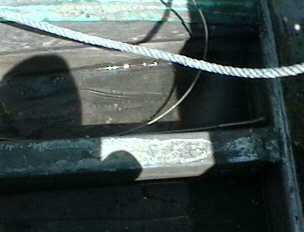
Rain Water in the Bilge below the Missing Sole |
The Cabin with Bulkhead, Deck,
|
The Factory Floatation is an Interesting Mix |
| Two sheets of 12mm Akoumi marine plywood were purchased. The old sole and bulk head were traced as patterns. The origial sole and hatch were trimmed with oak strips which were undamaged. These were salvaged. A lot of sanding was needed to remove carbonized tung oil and old varnish. All the new construction was glued with water proof moisture cure glue and fastened with brass screws. A lot of sanding, and rounding of edges was done. New hatch covers were cut to fit. Everything was given three coats of marine grade high UV protected satin polyurethane. The plywood edges actually received six coats. |
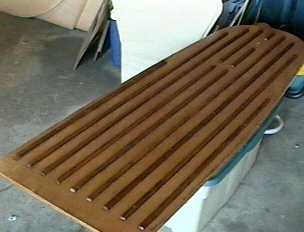
The Sole is Rebuilt |
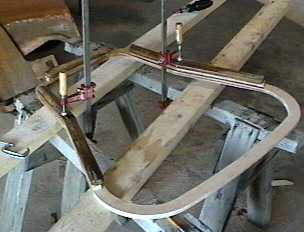
Glueing a New Hatch Frame |
The New Bulk Head Awaits the Hatch Frame |
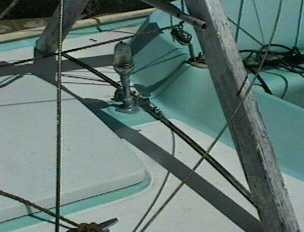
Most of the hardware was in good condition after being cleaned and oiled. I replaced some of the mounting bolts with stainless and rebedded the cabin top fittings. Some of the bases for the cam cleats were pretty much dried up and cracked, so I made new ones out of the plywood. They look interesting with striped sides.
| Two hardware pieces were changed. The boom vang was attached to an eyebolt which was part of the mast step. This was about three inches off center, so I attached a two and one half inch wide bail on the base of the mast to attach the boom vang on center. The jib tracks had a bull's eye fairlead which was turning the sheets nearly 180 degrees. I added a Ronstan 1377 fairlead block to the track. I also replaced all the rope halyards. The mainsheet, jib sheets and vang were all in good condition and used new Ronstan blocks. |
A Ronstan Fairlead on Track |
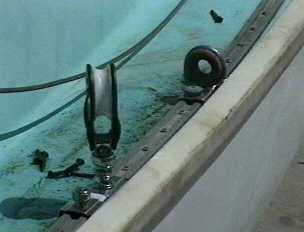
Cheekblock on Cabin Top |
Original Swivel Cleat on Cockpit Combing |
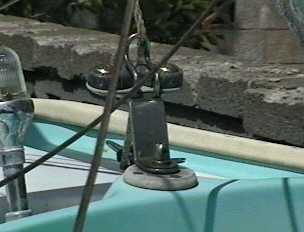
This Traveler was Added Later |
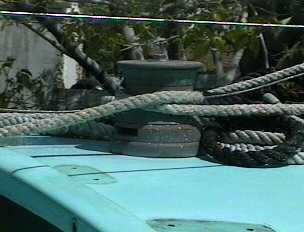
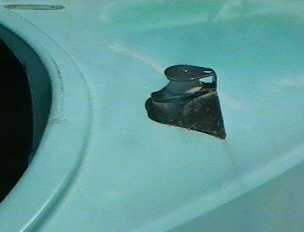
Bronze Main Winch on Cabin Top Centerline |
The boat came with two sets of jibs and mainsails. One set with number 357 and checkered flag in black and another set with number 195 and checkered flag in gold. The 357 set was pretty rough, but the 195 set should last another season or two. I had some work done on the mainsail headboard and the jib luff and clew. I believe #195 is the original number based on the fact that the sail set was more worn and more closely matched other boats of the same era.
The trailer was basically good, but I did rework the wiring. I drilled
some holes and attached the wiring harness more securely. I also matched
the wiring to my truck. The trailer had a one and seven eighths inch hitch
on an extension which was only three feet long.
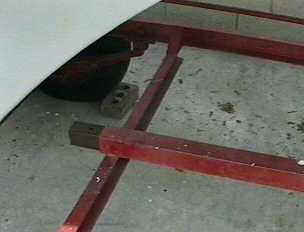
The New Tongue Extension Goes Nearly to the Keel |
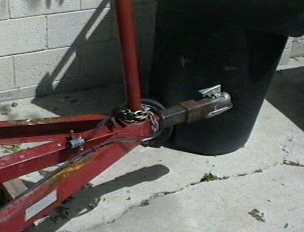
The New Extension is Eleven Feet From Front to RearI have changed this to a two inch hitch with an eleven foot extension. I guess the boat was always lauched with a sling and crane previously, or else the other owners drove submarines! |
|
|
If you have any tips or projects you would like to share let the webmaster know!